Specimen Data Entry: Difference between revisions
No edit summary |
No edit summary |
||
| (12 intermediate revisions by 2 users not shown) | |||
| Line 1: | Line 1: | ||
These instructions assume you know how to query and make attachments. | <span style="font-size:larger;">'''These instructions assume you know how to [[Attachments|query and make attachments]].'''</span> | ||
These are the minimum requirements for specimen data entry in EMu. | |||
< | Start by opening the Catalogue, Collection Events and Sites modules. | ||
= Recommended Settings = | |||
<span style="line-height: 20.8px;">Default Values: first be sure to have default values set for the Specimen Tab. For example, if you are databasing vascular plants, you can go to Edit->Default->Change and choose "Vascular databasing".</span> | |||
If your monitor is large enough to accommodate multiple windows, a recommended Module set up used by many users: | If your monitor is large enough to accommodate multiple windows, a recommended Module set up used by many users: | ||
| Line 10: | Line 13: | ||
:[[File:ClipCapIt-151123-165226.PNG|File:ClipCapIt-151123-165226.PNG]] | :[[File:ClipCapIt-151123-165226.PNG|File:ClipCapIt-151123-165226.PNG]] | ||
Click New in all Modules | <span style="font-size:medium;">Click New in all Modules</span> | ||
= Catalogue Module = | = Catalogue Module = | ||
| Line 18: | Line 21: | ||
Enter the Filed As Name by making an attachment to the Taxonomy Module. | Enter the Filed As Name by making an attachment to the Taxonomy Module. | ||
:[[File:ClipCapIt-151123- | :[[File:ClipCapIt-151123-172012.PNG|File:ClipCapIt-151123-172012.PNG]] | ||
<br/>Indicate the Filed As name by choosing Filed As = Yes. | |||
== Collection Tab == | |||
Enter the barcode number | |||
:[[File:ClipCapIt-151123-172049.PNG|File:ClipCapIt-151123-172049.PNG]] | |||
= Collection Events Module = | |||
== Collection Tab == | == Collection 1 Tab == | ||
Enter the Collector, Number, and Date: | |||
:[[File:ClipCapIt-151123-172137.PNG|File:ClipCapIt-151123-172137.PNG]] | |||
Enter any other participants in the Team field. | |||
= | = Sites Module = | ||
== | == Locality Tab == | ||
:[[File:ClipCapIt-151123-172240.PNG|File:ClipCapIt-151123-172240.PNG]] | |||
== Lat/Long Tab == | |||
Entering Latitude and Longitude depends on the format on the label. | |||
For Degrees, Minutes, Seconds (23° 34' 11" N, 117° 23' 44" W), use the Latitude/Longtitude (DMS) fields. You do NOT need to add the symbols. Just enter "23 34 11 N". | |||
For Decimal degrees (23.5697, -117.3956), use the Latitude and Longitude (Dec.) fields. | |||
EMu will convert to the other format automatically. | |||
:[[File:ClipCapIt-151123-172257.PNG|File:ClipCapIt-151123-172257.PNG]] | |||
= | = Save and Attach all Modules = | ||
:[[File:ClipCapIt-151123- | :[[File:ClipCapIt-151123-174014.PNG|File:ClipCapIt-151123-174014.PNG]] | ||
Latest revision as of 15:16, 1 June 2016
These instructions assume you know how to query and make attachments.
These are the minimum requirements for specimen data entry in EMu.
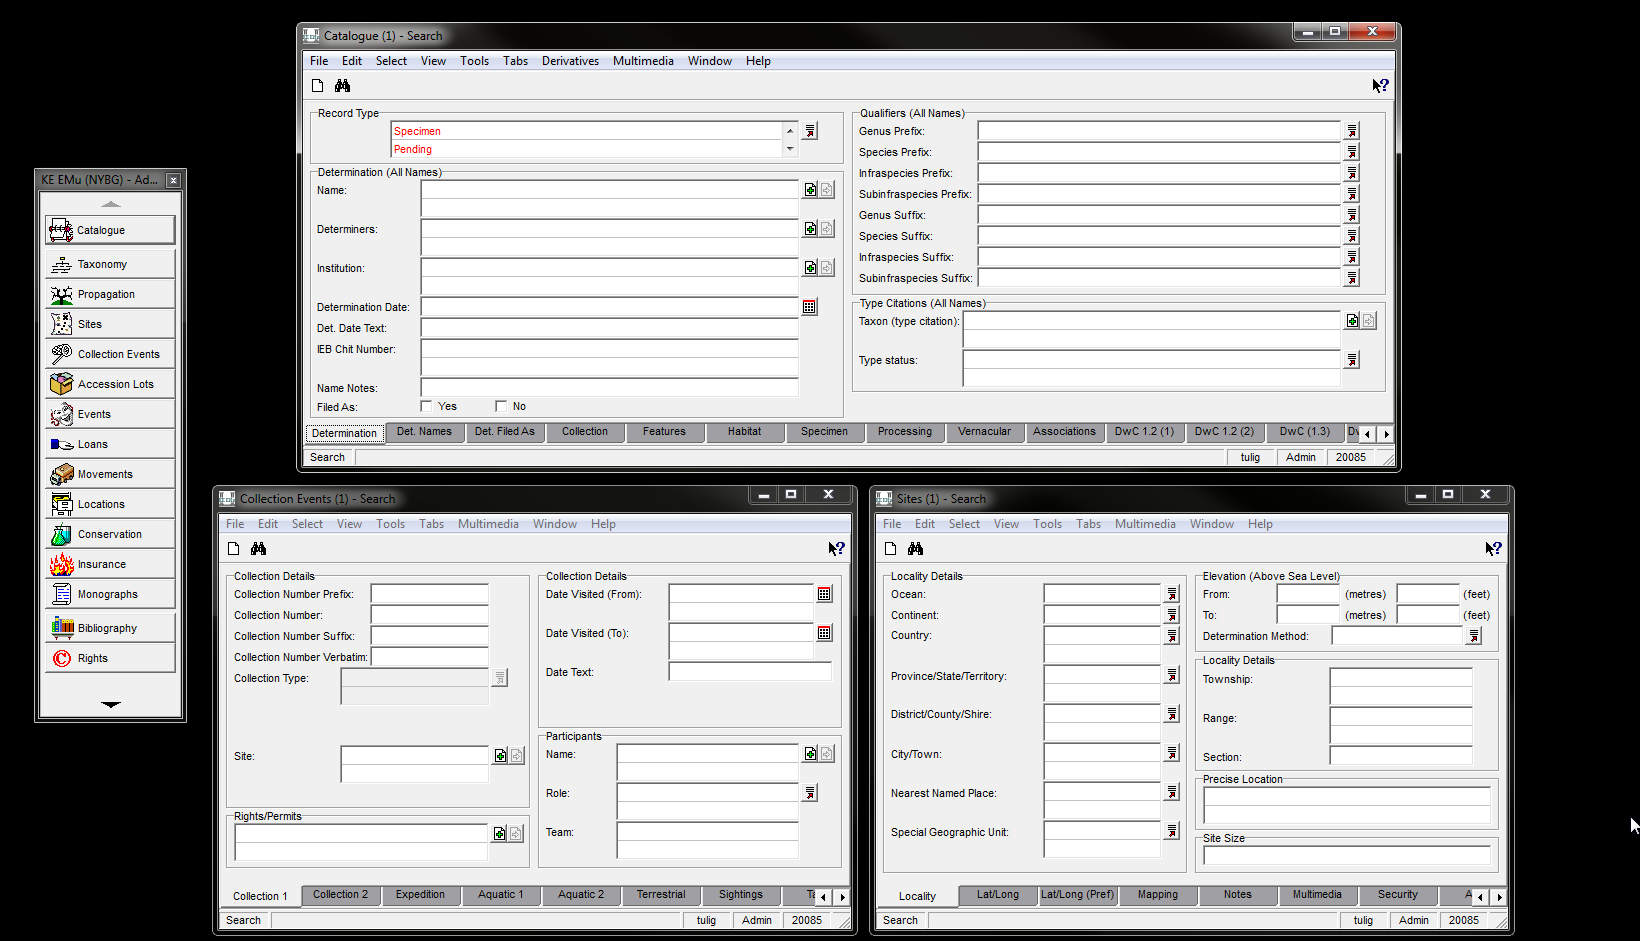
Start by opening the Catalogue, Collection Events and Sites modules.
Recommended Settings
Default Values: first be sure to have default values set for the Specimen Tab. For example, if you are databasing vascular plants, you can go to Edit->Default->Change and choose "Vascular databasing".
If your monitor is large enough to accommodate multiple windows, a recommended Module set up used by many users:
Click New in all Modules
Catalogue Module
Determination Tab
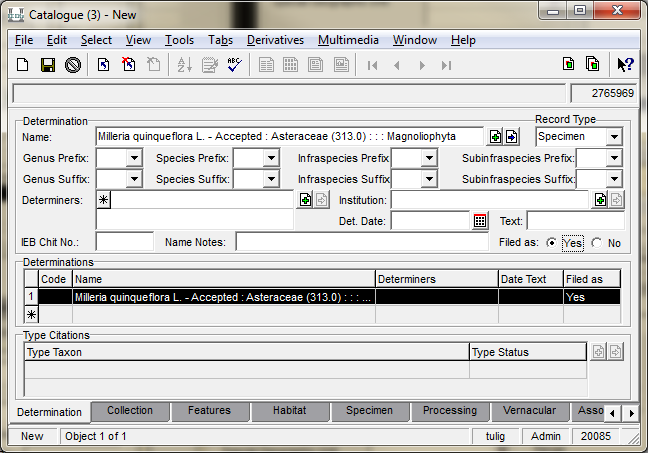
Enter the Filed As Name by making an attachment to the Taxonomy Module.
Indicate the Filed As name by choosing Filed As = Yes.
Collection Tab
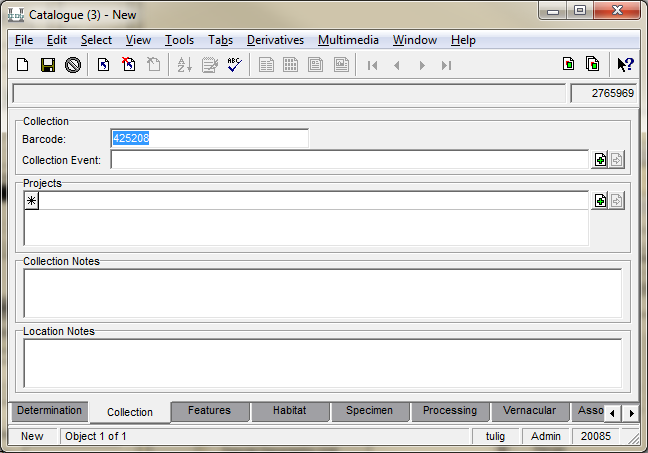
Enter the barcode number
Collection Events Module
Collection 1 Tab
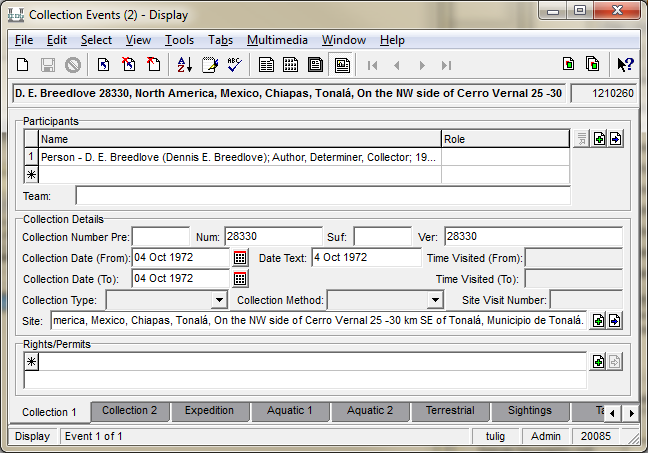
Enter the Collector, Number, and Date:
Enter any other participants in the Team field.
Sites Module
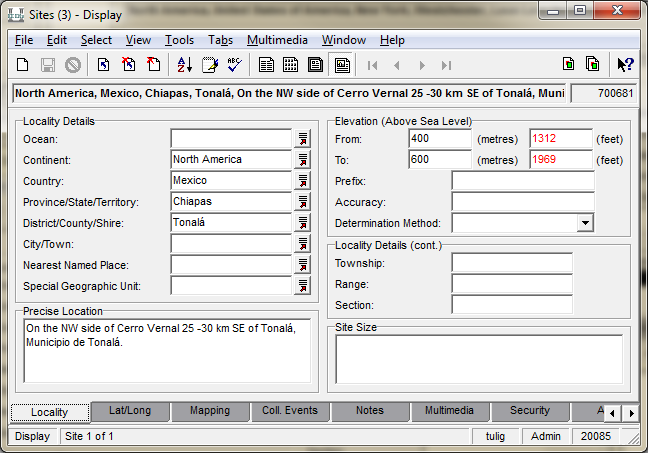
Locality Tab
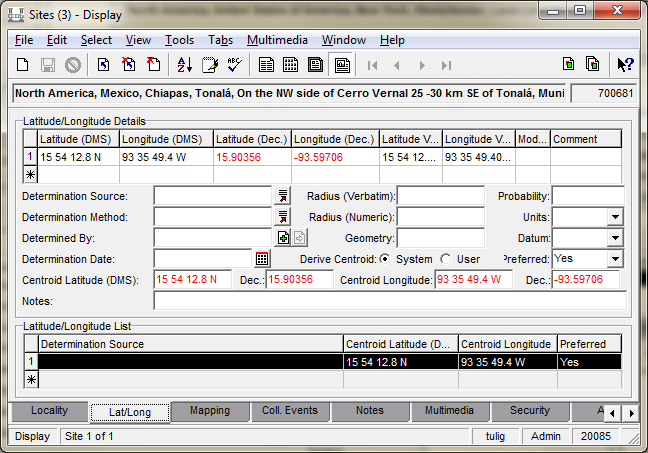
Lat/Long Tab
Entering Latitude and Longitude depends on the format on the label.
For Degrees, Minutes, Seconds (23° 34' 11" N, 117° 23' 44" W), use the Latitude/Longtitude (DMS) fields. You do NOT need to add the symbols. Just enter "23 34 11 N".
For Decimal degrees (23.5697, -117.3956), use the Latitude and Longitude (Dec.) fields.
EMu will convert to the other format automatically.
