How to use a Canon camera imaging station
Overview
This page contains information for first-time digitizers who would like to photograph plant specimens using a Photo-eBox inside the Herbarium Digital Imaging Center. Below are step-by-step instructions for getting started and selecting new-user preferences specific to software installed at a Canon or Nikon camera workstation. Detailed equipment specifications can be found on on the XXX page.
Getting started
- Power on the Photo-eBox by pressing the green power switch only. If there is no green switch, flip the switch on the far right side of the front panel. Please, do not touch the other switches or knobs. Allow the lights to warm up for ±3 minutes before you begin photographing specimens.
- Turn on the computer.
- Log in using your NYBG user name and password. If you do not have an NYBG user account, please log in as a visitor (visitor/Visi3tor).
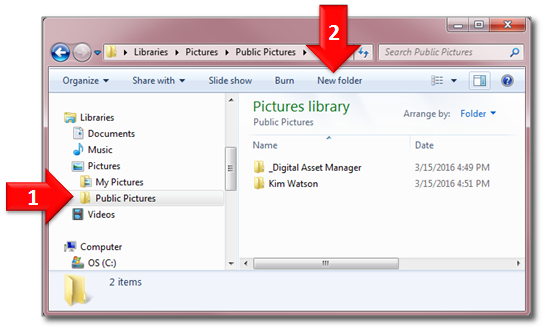
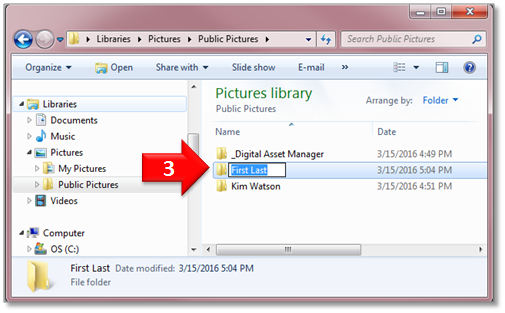
- If you do not already have a folder in the Public Pictures directory on the computer hard drive, please create one as follows:
- Using Windows Explorer, navigate to C:\Users\Public\Pictures
- Within "Public Pictures" create a new folder
- Rename the new folder with the digitizer's First then Last name
Using a Canon Camera Station
Start camera and software
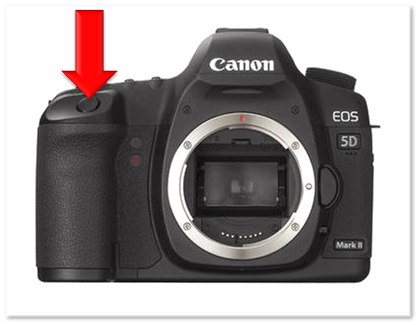
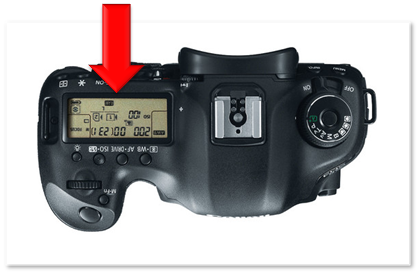
Wake up the Canon camera by gently pressing the shutter button half-way down. The camera is continuously powered on but hibernates when inactive. Numbers on the LCD screen as shown below indicate the camera is active. Please do not swich "OFF" the camera at the end of your session.
Any imaging workstation equipped with a Canon camera will have two software applications installed and ready for use on the computer's desktop:
- EOS Utility is used for remote camera control and shooting from the computer. First-time users must first select certain "preferences" before s/he may begin digitizing specimens.
- Digital Photo Professional is used to view raw image files captured with the Canon camera.
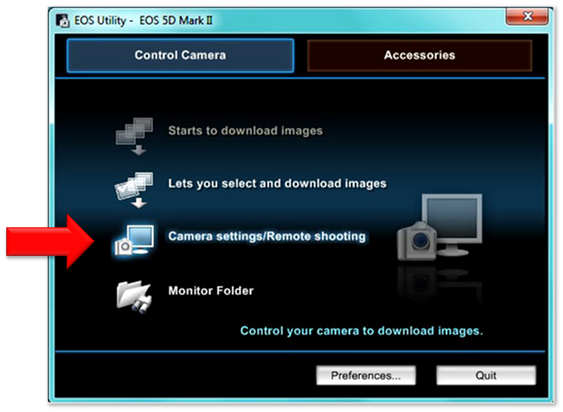
If EOS Utility does not open automatically when the camera is activated, open the software from the computer desktop. A window like the one shown below will open.
Select "Camera settings/Remote shooting"
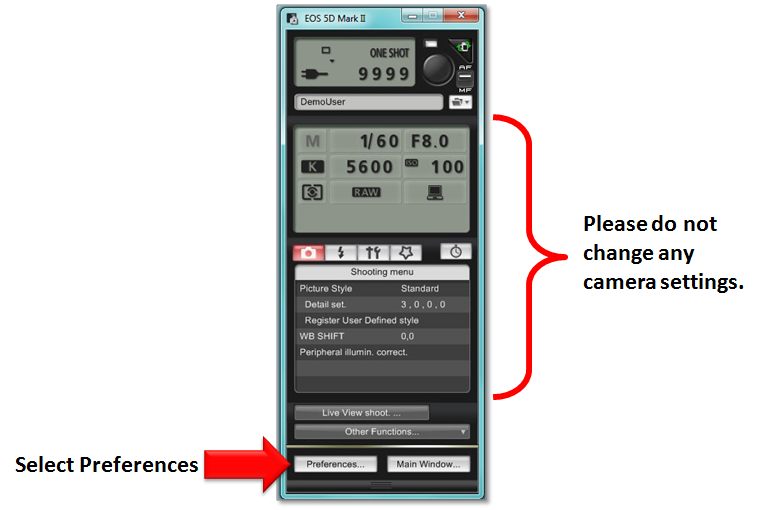
Select "Preferences"
The "Camera Settings and Remote Shooting" interface allows the user to change camera settings and press the shutter release button from the computer. Please do not change any camera settings without the assistance of the Digital Asset Manager. They have been pre-selected according to the lighting conditions specific to each imaging workstation.
Select "Preferences"
Basic
Destination Folder
File Name
Linked Software
Using a Nikon Camera Station
Any imaging workstation equipped with a Nikon camera will have two software applications installed and ready for use on the computer's desktop:
- Camera Control Pro 2 is used for remote camera control and shooting from the computer. First-time users must first select certain "preferences" before s/he may begin digitizing specimens.
- ViewNX is used to view raw image files captured with the Nikon camera.

