How to reserve a camera station: Difference between revisions
Jump to navigation
Jump to search
| Line 60: | Line 60: | ||
== Open Microsoft Outlook == | == Open Microsoft Outlook == | ||
Your Outlook interface will look similar to the image below. In the panel on the left | Your Outlook interface will look similar to the image below. In the panel on the left, search for "Public Folders." | ||
If "Public Folders" is not visible, select the folder icon indicated by the arrow below. | If "Public Folders" is not visible, select the folder icon indicated by the arrow below. | ||
| Line 66: | Line 66: | ||
[[File:Outlook 01.PNG|center|]] | |||
== Select a camera and date == | == Select a camera and date == | ||
Revision as of 22:01, 3 January 2023
Overview
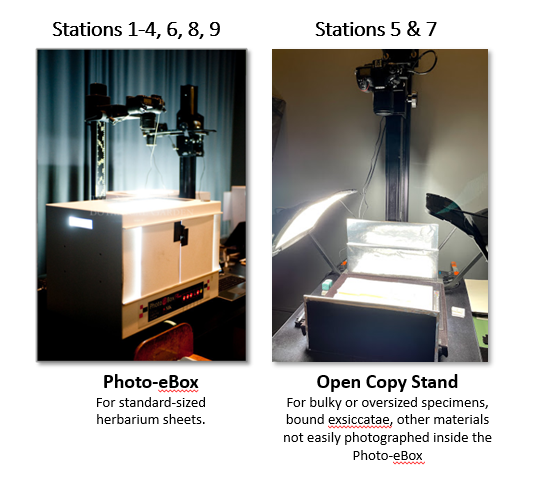
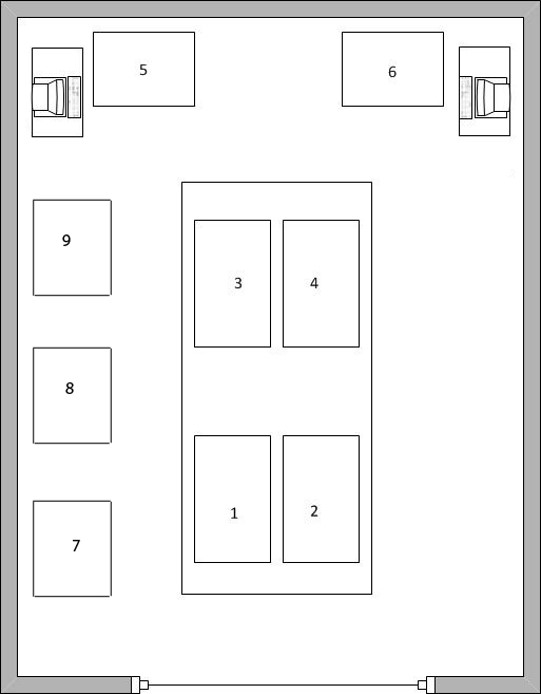
The Herbarium Digital Imaging Center currently contains 9 specimen imaging workstations. Each camera station is numbered and must be reserved prior to use.
You must have an NYBG email address and have been granted access to the "Herbarium Calendars" in order to make a reservation. Contact Leanna McMillin if you need assistance.
Please be courteous to others when reserving a camera:
- Do not sign up for a camera and then not use it.
- If your imaging schedule changes, update or delete your reservation for the camera.
- If you finish early, update your reservation so others know the camera is available.
- Do not create an appointment "series" and reserve a camera every day for weeks in advance. Make individual appointments and sign up a few days to a week in advance.
Reserve via Web Browser
Log in to NYBG email account
Use the following web address: https://webmail.nybg.org
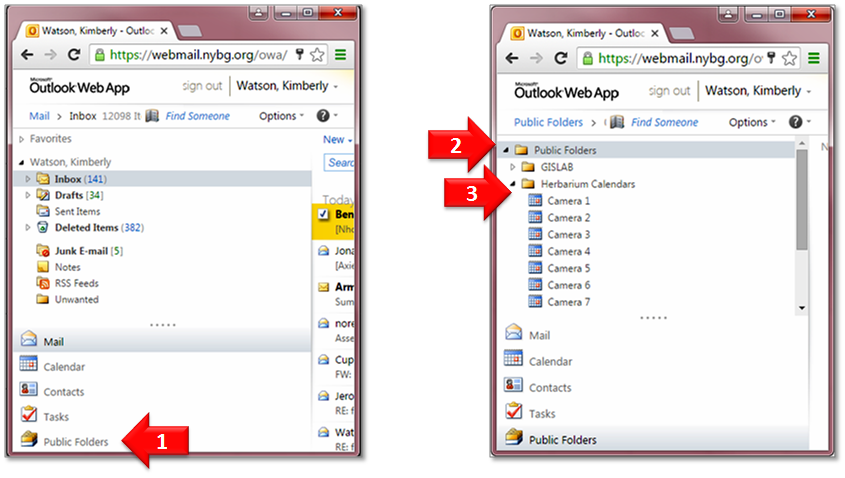
- Select "Public Folders" in the lower left corner of the Outlook Web App.
- Reveal the subfolders within "Public Folders".
- Reveal the subfolders within "Herbarium Calendars". (*Contact Leanna McMillin if these are not visible)
Select a camera and date
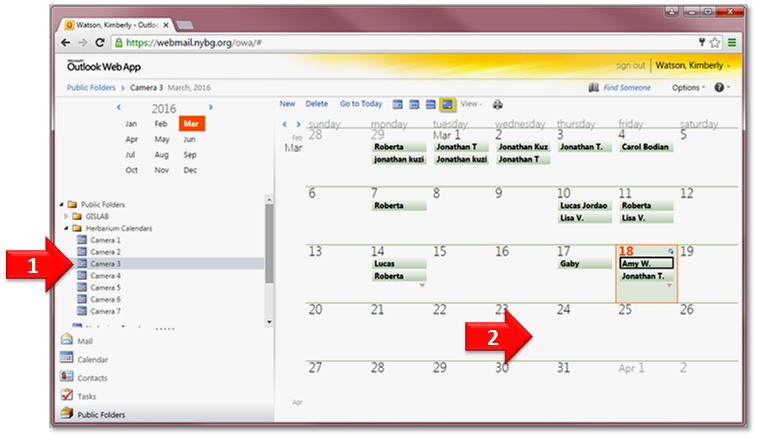
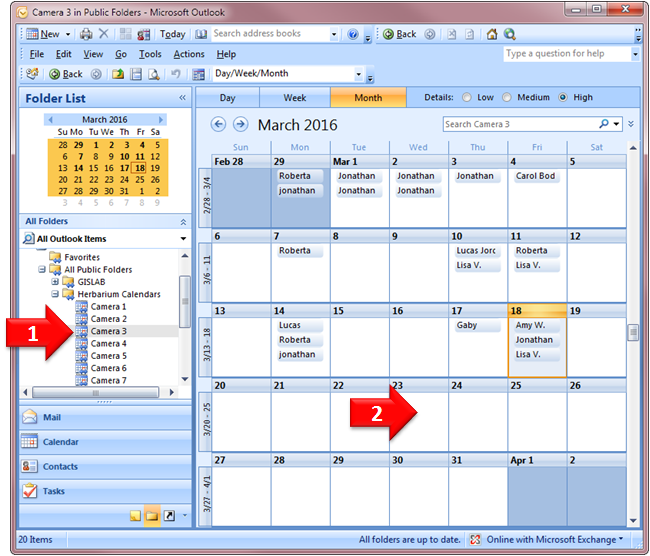
- Select the camera you wish to reserve
- Double click on the preferred date to create an appointment
Make a reservation
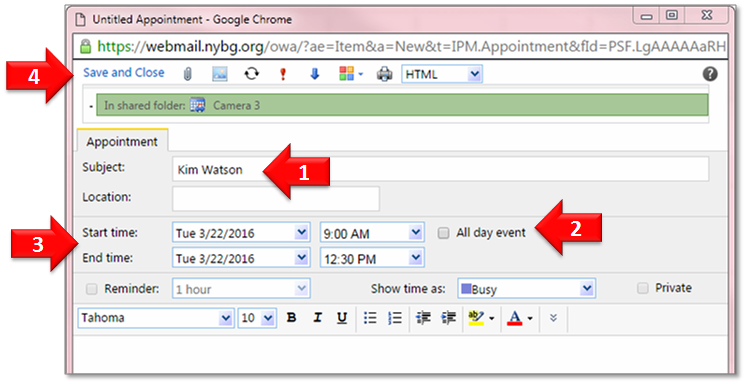
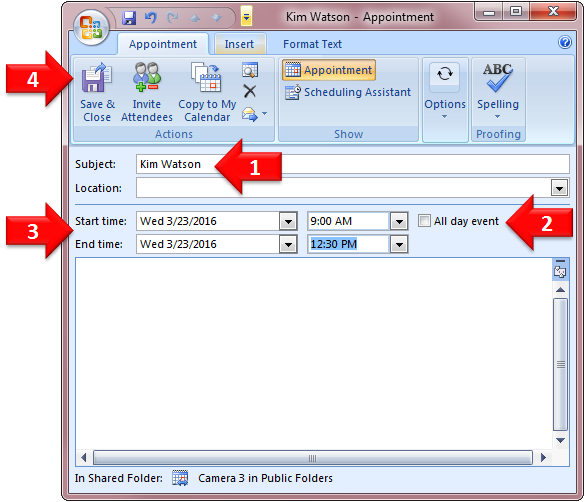
- Enter digitizer's First and Last name in the Subject field
- Deselect "All day event"
- Select "Start time" and "End time"
- Select "Save and Close"
Reserve via MS Office Outlook
Open Microsoft Outlook
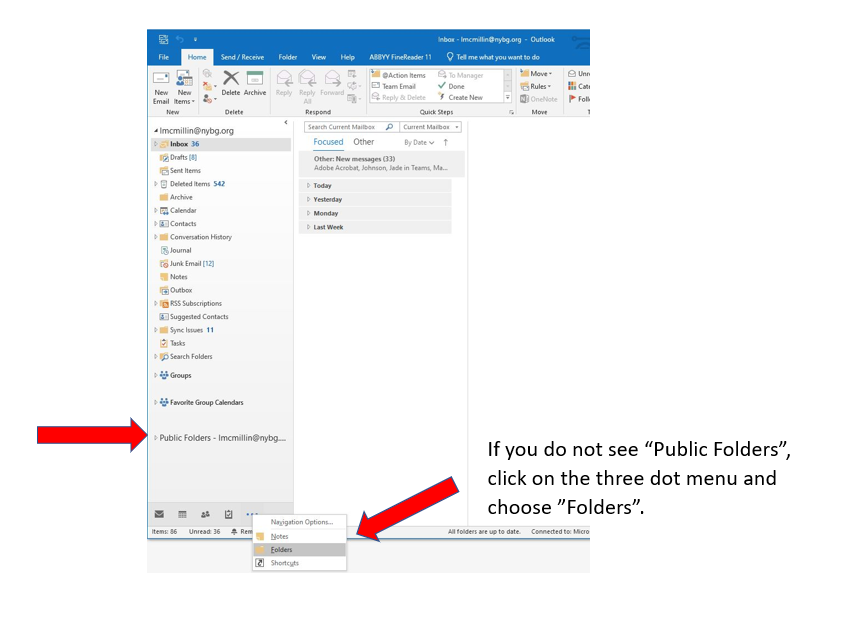
Your Outlook interface will look similar to the image below. In the panel on the left, search for "Public Folders."
If "Public Folders" is not visible, select the folder icon indicated by the arrow below.
Select a camera and date
- Select the camera you wish to reserve.
- Double click on the preferred date to create an appointment.
Make a reservation
- Enter digitizer's First and Last name in the Subject field
- Deselect "All day event"
- Select "Start time" and "End time"
- Select "Save and Close"
